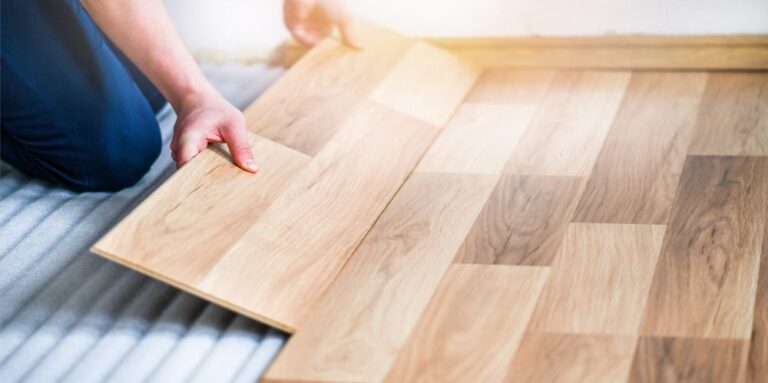
Hardwood flooring has long been a preferred choice for homeowners, offering timeless beauty and exceptional durability. Among the various types, prefinished hardwood flooring has gained popularity due to its convenience and efficiency during installation. This guide will take you through the steps of installing prefinished hardwood flooring, its benefits, and expert tips for a flawless finish.
Why Choose Prefinished Hardwood Flooring?
1. Convenience and Speed
Prefinished hardwood planks come ready with a factory-applied finish, eliminating the need for sanding or staining on-site. This reduces installation time significantly.
2. Durability
Factory finishes are applied under controlled conditions, making them more resistant to wear and tear compared to site-finished floors.
3. Minimal Disruption
Since there’s no need for on-site sanding or staining, the process is cleaner and less disruptive, making it ideal for occupied spaces.
4. Consistent Finish
Prefinished planks offer a uniform look, as they are treated and sealed with precision.
Tools and Materials Needed
Before starting the installation, gather the following tools and materials:
- Prefinished hardwood planks
- Measuring tape
- Chalk line
- Pry bar
- Flooring nailer or stapler
- Hammer
- Underlayment
- Wood glue (if required)
- Saw (circular or miter)
- Safety gear (goggles, gloves, and ear protection)
Preparing for Installation
1. Acclimate the Wood
Prefinished hardwood needs to acclimate to the room’s temperature and humidity levels. Place the planks in the room where they will be installed and leave them for 3-5 days.
2. Inspect the Subfloor
A clean, dry, and level subfloor is critical for successful installation. Check for:
- Uneven areas and level them if needed.
- Moisture issues, as hardwood is sensitive to water damage.
3. Install Underlayment
An underlayment provides soundproofing and moisture resistance while creating a smooth surface for installation.
Installation Methods
The method you choose depends on the type of prefinished hardwood and the condition of your subfloor. Common methods include:
1. Nail-Down Method
This method involves securing planks with nails or staples and is best for solid hardwood flooring.
2. Glue-Down Method
Using wood adhesive, this method works well for engineered hardwood over concrete or plywood subfloors.
3. Floating Method
Planks are locked together using a tongue-and-groove system without attaching them to the subfloor, making this method ideal for DIY projects.
Step-by-Step Installation Process
Step 1: Plan Your Layout
- Measure the room and decide on the direction of the planks. Installing them parallel to the longest wall or main light source creates a visually appealing look.
- Use a chalk line to mark a straight reference line for the first row.
Step 2: Install the First Row
- Start with the longest, straightest wall.
- Place spacers between the wall and the planks to leave room for expansion (usually ¼ inch).
- Secure the first row using nails, glue, or locking systems, depending on your chosen method.
Step 3: Lay Subsequent Rows
- Stagger the joints between rows for added stability and a natural appearance.
- Fit each plank snugly against the previous row using a tapping block or mallet.
Step 4: Cut Planks to Fit
- Use a saw to cut planks as needed for corners, doorways, or end pieces. Ensure a tight fit without forcing the wood.
Step 5: Finish Edges and Transitions
- Install baseboards or trim to cover the expansion gaps along the walls.
- Use transition strips where the hardwood meets other flooring types.
Step 6: Final Touches
- Clean the floor to remove dust and debris.
- Inspect the installation for any gaps or imperfections.
Benefits of Professional Installation
While installing prefinished hardwood flooring can be a DIY project, hiring professionals ensures:
- Precision and Expertise
Skilled installers handle intricate details, ensuring a seamless finish. - Time Efficiency
Professionals complete the project faster and with fewer mistakes. - Warranty Coverage
Many flooring companies offer warranties only when installation is done by certified professionals.
Tips for Maintaining Prefinished Hardwood Flooring
- Regular Cleaning
Sweep or vacuum the floor regularly to prevent dirt from scratching the surface. - Avoid Excess Moisture
Use a damp (not wet) mop with a hardwood-safe cleaner to maintain the finish. - Use Rugs and Mats
Place mats at entrances and rugs in high-traffic areas to reduce wear and tear. - Protect from Furniture Scratches
Attach felt pads to the legs of furniture to prevent scratches. - Monitor Humidity Levels
Maintain indoor humidity levels between 30-50% to prevent wood from expanding or contracting.
Common Mistakes to Avoid
1. Skipping Acclimation
Skipping the acclimation step can lead to warped or misaligned planks after installation.
2. Poor Subfloor Preparation
A poorly prepared subfloor can result in squeaky or uneven flooring.
3. Neglecting Expansion Gaps
Failing to leave expansion gaps can cause the floor to buckle over time.
4. Using the Wrong Tools
Improper tools can damage the wood or lead to a subpar finish.
5. Rushing the Process
Take your time to ensure each step is done correctly for a professional-looking result.
Frequently Asked Questions
Q1: How long does it take to install prefinished hardwood flooring?
The time varies based on the room size and installation method but typically takes 1-3 days.
Q2: Can prefinished hardwood be installed over existing floors?
Yes, as long as the existing floor is level and in good condition. Floating and glue-down methods are ideal for such cases.
Q3: What is the cost of installing prefinished hardwood flooring?
Costs depend on the type of wood, labor, and room size but typically range from $5 to $12 per square foot, including materials and installation.
Conclusion
Installing prefinished hardwood flooring is an excellent way to enhance your space with minimal hassle. Its ease of installation, durability, and aesthetic appeal make it a top choice for homeowners. Whether you tackle it as a DIY project or hire professionals, following the correct steps ensures a flawless and long-lasting result. Enjoy the timeless beauty of prefinished hardwood floors that elevate your home’s value and charm!
